How to use Viber on iPhone

Viber Is available on the market for about 7 years, and for all this time the product has constantly being developed and improved. Due to the support of multitude of operational systems, from desktop to mobile, from Windows Phone and Android to Windows and Mac OS X, the popularity of VoIP-messenger has severely grown for all this time.
In December of 2010 the version for iOS has appeared on the App Store, but those times it had much limitations and not quite a lot of working possibilities. Since that period Viber has grown into an over popular VoIP-giant with tons of useful functions, user-friendly and intuitive interface, and fantastic scalability. In this article I will tell how to use Viber on iPhone and what special features it has.
The obligatory operation that anticipates the using of service on your iPhone is the setup.
The first step which you perform before using the messenger is visiting the App Store or official iTunes page and downloading the program from the market. After downloading is completed, the installation routine starts. On the first screen you may see the welcome page. Click the “Continue” button. After that the program suggests you to input your phone number. The principle of Viber operation is based on linkage of application account to the phone number, so make sure, that you entered the correct info.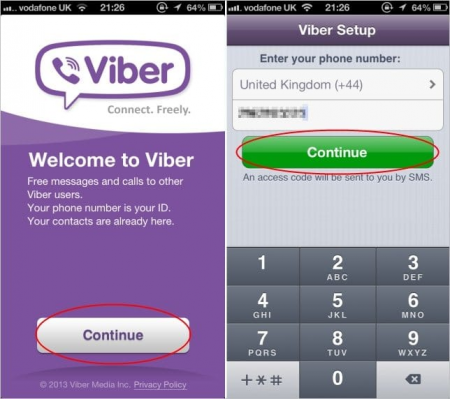
On the further the notification window will appear on the screen. On this form you need to check once more the validity of your phone number, and if there are no mistakes, in a second you will receive the SMS-message with the approval code, which you need to enter in the appropriate field. Such a scheme is required in order to guarantee the safety of your account and prevent the interrogation of third-party persons to your private info. Therefore, an access code has been received, entered into the corresponding box and approved, so we move on further.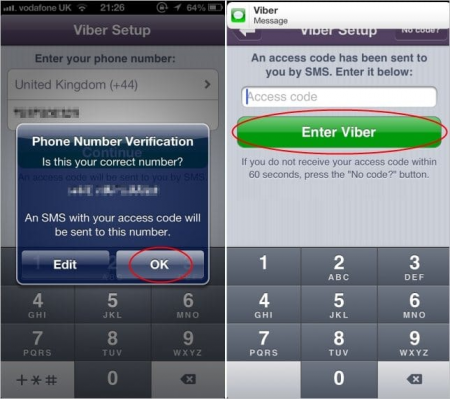
The next step relates to the permission for the app to get access to the contact list. Tap OK in order to set this permission to “On”. A bit later you will need to enter your contact name, which will be displayed next to your number on the contact list on the gadgets of your friends. At the same time, you will be given a chance to enter the Viber account after all.
After you enter the acc, you will immediately be able to call any of your friends simply by tapping on their name in the contacts list. One important warning: the free calls are available only to the persons who have Viber icon displayed next to their name. Concerning the rest of contacts, you may connect to them using paid Viber Out function with minimal prices via Wi-Fi or 3G/4G connection.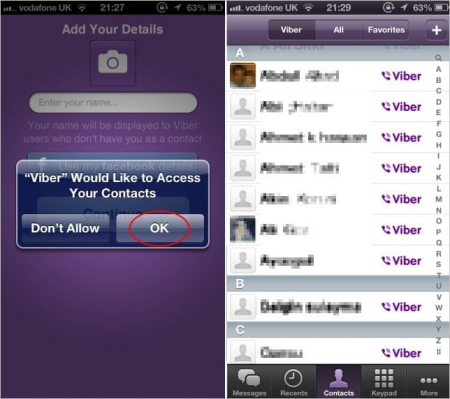
In order to get the detailed information regarding this or that person, click on their name once. As a result, the info form will appear, where you may investigate the contact info of that person, send a text message, or make video-/audio-call.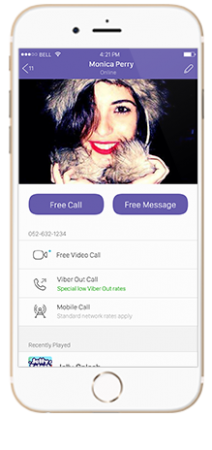
To answer a call is also just a piece of cake. Just pick up the phone in the same way as you do with ordinary incoming calls on your gadget, and the call will be accepted.
Moreover, you are able to decorate the text messages with animated stickers and emoticons. Put them in in the same way, like you did with smiles in Skype or ICQ, and the person will see the result of your creativity. In addition to free picturesque objects, the shop of new unique and non-standard graphical images is available for you in Viber, thus you may open up your imagination and empower it on the higher level.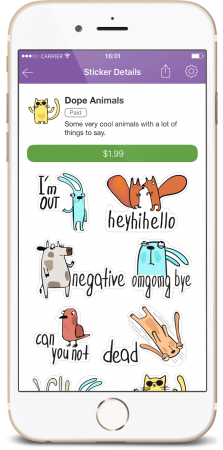
At last, in the app you’ll be able to find lots of useful settings and customization options. Here you can set up as visual representation of your app, as functional readiness. A quantity of security tricks is available as well, so you may not worry about the protection of your Viber app instance.
Learning of how to setup Viber on iPhone and use it is simple and straightforward process, and you will get plenty of pleasant surprises while discovering the abilities of the program tool.